Monday, 16 September 2013

Eden Mills Writer's Festival 2013 - Reader introductions

Yesterday I attended the Eden Mills Writer's Festival.  Daughter was invited to introduce a few of the authors.  Her friend Kathleen and another young lady, Liz, also did some excellent introductions.  I have included short videos of each of these.  I find that these are a good way to get a snap shot of who these authors are as well as a hint of what they are writing about.

Author Philip Roy

Seas of South Africa Cover - finalHas written a wonderful series about a boy, Alfred,  and his submarine in which he travels and learns about the world and it's many varied people.  When the series opens, Alfred is 14 making this book suitable for readers about 10 years of age and older.  Thanks to Philip for use of the cover image.


Author Kat Kruger

Kat read to us from her debut novel, The Night has Teeth. The follow up book, The Night has Claws is now available in Canada and will be released in the USA in 2014.  German translations are in the works, due in August 2014.  Thanks to Kat for use of the cover image.


Author Darren Hynes

Image of CREEPSCreeps is Darren's second novel and it deals with the difficult topic of bullying.  Loved his reading, complete with an east coast accent.  Thanks to Penguin Canada for use of the cover image.


Author Rachel Hartman
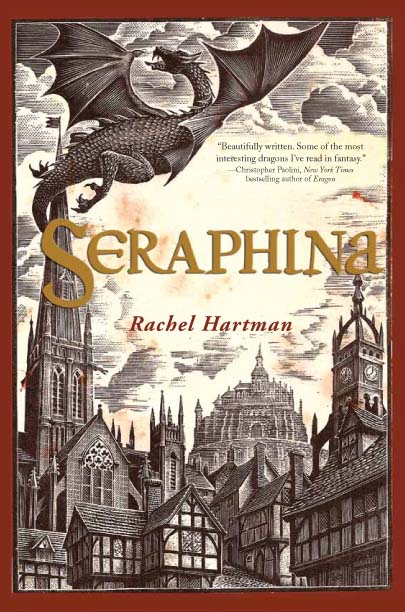
Seraphina is Rachel's debut novel and it is already winning her awards. I absolutely love the cover of this dragon book which is from a wood cut image.
Thanks to Rachel for the use of the cover image.


Author Sheree Fitch

My daughter was entranced by Sheree's recent book Pluto's Ghost.  She lists it as a "must read" book.  Sheree has written books for children, teens and adults.  Thanks to Sheree for use of the cover image.


Author Stephen Cain

I Can Say Interpellation by Stephen CainStephen proves once again, that poetry can be fun and that it can be about any topic.  I loved that he wrote about topics kids can relate to such as Pauline from Donkey Kong.  (which is included in the following video).  He new book is titled I Can Say Interpellation.  Thanks to Stephen and Bookthug  for use of the cover image.


Author Lesley Livingston

EVERY NEVER AFTERLesley is one of the most enthusiastic readers.  She makes the characters sound exactly as I had imagined them to be. Makes me want to start her books all over again and listen to the audio books that she read.  Thanks to Lesley for the use of the cover image.


Author Deborah Ellis

978-1-55498-181-6_l.jpgDeborah is not shy about tackling those sensitive topics that many of us shy away from.  Thank-you.   She read to us from her non-fiction works Children of War and Kids of Kabul. Both passages portrayed situations that children should not have to face.  I'm really looking forward to her upcoming book Looks like Daylight: Voice of Indigenous Kids. Thanks to Deborah for the use of the book cover image.

978-0-88899-908-5_l.jpg


Sunday, 15 September 2013

Needlework Special - My mom's projects of the moment

I've introduced my mom to you before, but for those who haven't viewed her online quilt show, I'll do it again.  This is my mom, Elaine Tucker and she is a quilter.  In a change of tradition, I was the one who introduced her to quilting.  I asked her to come with me on a bus trip to Paducah some years ago, she said yes, but that she didn't quilt.  Well, neither did I as I had just recently started.  Let's now say, that the rest is history and that she can be found quilting every day.

The first two photos shew here with her latest bag, the Ellipse Bag, designed by Brenda Miller from Among Brenda's Quilts.


 The class that the took was taught by the designer herself.  The only thing mom would change is a longer strap if you were wanting to wear it across the body.

Both of us have been collecting selvedges for ages, but she has actually made a quilt.  The pattern is from Karen Griska at the Selvedge blog.  Some of the strips didn't have printing on the edge, instead of discarding them, she used colourful thread and machine stitched a row of fancy stitches.


Laundry Basket quilts is new to her local shop, Cornerstone Quilts.  The owner started a regular Thursday group and they work on various patterns by Edyta.  Currently they are working toward their first Laundry Baskets inshop quilt show.


Occasionally, mom meets with a group of quilting friends and they work on projects and chat.  This is a mystery that one of the members shared with them.  It's still in need of the borders shown in the following photo.


The blocks are all finished for this Bonnie Hunter mystery from a current magazine.

 
Another set of blocks from a pattern by Edyta, those these are still in the works.

 
This disappearing 4 patch is a left over from a quilt that is currently being displayed at the London Fall Fair     in London, Ontario. Sorry, no picture of the quilt, but I will update once she gets if back.

The tumbler quilt was also inspired by a pattern from Laundry Basket Quilts, though she used a template from Marti Michell.  I'm surprised at how quickly this went together as I only gave her the template at mother's day.


Bargello has in been in progress for quite some time and has been put aside for way too long.  Now that she's been reminded of it, she is intent to get back at it this winter.  pattern unknown.

 
These half square triangles are the basis for her next bag.  An update from Elaine earlier in the week tells me that the blocks are all sewn together and waiting the next step.  I'll add photos next time I see it.
 
Thanks for joining me for a peek into my mom's sewing room.

Tuesday, 10 September 2013

Needlework Tuesday - A Quilt fit for a Baby

Needlework Tuesday is a regular weekly post where I share the progress of my various needlework projects over the past week. I enjoy the encouragement that I receive from my readers and in return visit their blogs and cheer them on with theirs. You are welcome to grab the cute little mouse and create your own Needlework Tuesday post. Leave a comment with a link and I'll be sure to visit with you.
 
It would have been my father's 70th birthday today.  Happy Birthday Dad, I love you and miss you every day. Triple chocolate cake all around.  ( I would bake him a cake, but Ontario Hydro was working in my neighbourhood on Saturday and when they turned the power back on, they created a power surge that destroyed the control panel on my stove, and that part is not longer available, so I need a new stove if I ever want to use an oven again.)
 
What is a leader and ender project.  When you sew a seam, you waste a lot of thread at the beginning and at the end of the seam.  Also, when you are sewing with small pieces of fabric, such as in a quilt, occasionally they tend to get pulled down into the machine by the needle.  To alleviate this, you can start and end the seam with a small scrap of fabric, called a leader and an ender.  To increase your productivity, instead of a scrap of fabric, substitute in pieces from a long term quilting project, hence a leader and ender project.  As far as I am concerned, Bonnie Hunter at Quiltville is the goddess of such projects.

 Since January I have been working on a leader and ender.  Finally, step one complete.  224  of the 2 1/2 inch white and yellow four patch blocks. One to step 2.

Wednesday last week was a full day of cutting.  This time, I was into blue fabric.  My neighbour is expecting her first grandchild in Novemeber and was hosting a baby shower this past weekend.  I was hoping to at least get a few of the blocks completed for the quilt.  By the end of the day, I cut all the pieces for the baby quilt, the rest of the blue pieces for my leader and ender project (the one shown above) and then I cut all but the background for a new project.  It's the cover one from the Fall 2013 issue of Fons & Porter's easy Quilts.

 On to the baby quilt.  I selected the "Flying Stars Sampler" from Knockout Blocks and Sampler Quilts by Judy Martin.  While the book is no longer in print, you can get it in software version,  Star Power CD-ROM from Electric Quilt.  Note, you must have EQ7 to be able to use this software.

Time to make flying geese.   I needed 32 and decided to use the no triangle method.  There's a good tutorial at Patch Pieces.

 
Flying geese all done. 
Time to make the blocks. 
Oh wait, that's after I piece 90 some odd half square triangles.

 
One centre block

 
Four corner blocks.


Daughter suggested that I use green for the outer border.  Turns out that was the correct choice.
The top finished at 53 1/2 inches and I did have it ready to take to the baby shower.  Next step is to finish it before the due date in early November.
 
On Sunday, I am planning a mini show of my mother's current projects. I have been alluding to some of them in my posts over the past few months, but kept forgetting to take my camera.  I finally got my act together and we took a bunch of photos.  See you then.
 
Tami, at Just One More Thing, has posted a new prayer flag that she made and some lovely pillows.
 

Tuesday, 3 September 2013

Needlework Tuesday - Achieving Accuracy

Needlework Tuesday is a regular weekly post where I share the progress of my various needlework projects over the past week. I enjoy the encouragement that I receive from my readers and in return visit their blogs and cheer them on with theirs. You are welcome to grab the cute little mouse and create your own Needlework Tuesday post. Leave a comment with a link and I'll be sure to visit with you.

For the past three months I have been working at the Aiming for Accuracy Quilt Along.  I am quite pleased with my blocks and am improving with regard to sewing accurate sized blocks.  It got me thinking about how to improve your quilting even before you start sewing.  There are 3 points that I feel help me.  I'll share them in the rest of the post.  The block at left is from Lesson 7.  I did some fussy cutting to ensure that the striped fabrics all went the same direction.  Definitely worth the effort.
Lesson 8 resulted in this block.  The hourglass in the middle is quite attractive and easy to match at the centre.  Proper trimming resulted in accurate points.  After completion, this block was sewn to its neighbours.  First section of the quilt assembled.  yippee.

1) I pre-wash my fabrics.  They go in the washing machine and go through part of a wash cycle, then spin and next the dryer.  The only exception is when I am doing a stack and whack technique where I have to match up layers of identical prints, these I don't wash as then it seems so much harder to match them.

Lesson 9.  I have been looking to find the name of these blocks, but it doesn't show in ay of my books.  The fabric in the middle block is one my son chose years ago.  It is very thin.  I wanted to use it, so I backed it with a very thin fusible interfacing.  The interfacing has been there for about 8 years and shows no signs of yellowing or peeling. 

2) Press your fabric after pre-washing and then let it sit and cool before you cut.  The action of the ironing pushes the fabric all around and might stretch it a bit.  The fabric needs some time to relax after all that exertion.  You don't want it relaxing after you have cut your pieces as they might shrink ever so slightly and then it will throw off the size.  Every thread width really does count.


Lesson 10, I am now up to date.  These square in the square blocks were sewn with over sized triangles then trimmed to size.  Yes, it did was a bit of fabric, but I didn't cut off any of the points.  The squares were designed to be a bit small so that they float with in the unit.
3) Cut accurately.  Look at your rulers very carefully and you will notice that all the lines have a thickness.  My rulers have some lines than are thinner and have cross hairs.  Those are the ones that I line up with the edge of the fabric.  If you are a thread or two too small or to large, it will affect the result as all those threads add up.  Also, if you are making a long cut, you should walk your fingers along the ruler.  (cut a few inches, then move your other hand up the ruler to hold it firmly, then cut some more, stop and move your hand, then cut some more.). You can't hold the ruler steady from one spot and expect it not to move 15 or 20 inches away.  You should also check that you haven't shaved off the corners of your ruler.  I know that one of mine is no longer quite square as I have nipped it with the rotary cutter a few times.  Time to replace it.
 
I hope that you find these hints helpful.
 
I am being diligent at working at these little churn dash blocks.  It's like eating popcorn, I can't just eat one handful, I have to eat a bunch.  Well, I can't just sew one of these blocks....

Love these long weekends that are spent at home, it always give me extra sewing time.  Today daughter started her last year of high school and in theory that gives me more stitching time during the day, but I'm not holding my breath, other errands await. 

My Travelling Jane quilt has been visiting Ada at The Light-Hearted Quilter.  Ada promises that she'll share Jane's continuing adventures in a future post.

Marie, at Daisy's Book Journal, has had her fingers flying.  Two new knitting projects and a Zentangles plan for the year.

Over at Lit and Laundry, Sarah has posted an update about her intricate Santa's Village Cross Stitch.

Monday, 2 September 2013

350 Block Challenge - August Blocks

This is my first time reporting on my progress for the 350 Block challenge hosted by Prairie Moon Quilts..  I exceeded the monthly goal by a few blocks and completed 36 for a total of 87.  Hoping to do a little better this month.  So, what did I sew:

Saturday Morning Sample Class
2  - 9 inch blocks
15  - 4 1/2 inch blocks

Charity Projects
1  -slab block
1  - resew a donated block

Aiming for Accuracy Sew Along
completed 5 lessons for a total of 8 blocks

9 mini Churn Dash blocks

Photos of these blocks can be found in my recent posts:
August 13
September 3

I'll return with a new update at the beginning of October.